
I will look in this article on how to prune Spring perennials properly and avoid disasters down the road either with your plants itself or yourself by cutting yiour own a fingers. Spring perennial pruning shapes how your garden performs throughout the growing season. When you cut back plants at the right time and in the right way, you encourage stronger growth, more blooms, and better overall plant health. But timing matters more than most gardeners realize.
The key to successful spring perennial pruning is knowing whether your plants bloom on old wood from last year or new wood from this season, then cutting accordingly to avoid removing this year’s flowers. Making the wrong cut at the wrong time might cost you a full season of blooms. The good news is that most perennials can recover from pruning mistakes, so you’ll get another chance next year.
Proper spring perennial pruning improves your plants’ health and appearance while helping them produce more flowers. With clean tools, basic knowledge of your plants’ cycles, and a few simple techniques, you can transform your garden into a thriving display. This guide walks you through everything you need to know about when to prune, what to cut, and how to avoid common mistakes that hold your perennials back.
- Prune spring perennials based on whether they bloom on old or new wood to avoid cutting off this year’s flowers
- Always use clean, sharp tools and sanitize between plants to prevent disease spread
- Remove dead, diseased, and damaged growth at any time while saving major pruning for the right season
Understanding Pruning Timing and Plant Cycles
Thank you to Josh from Gardening Australia for this Excellent Video</strong
Getting the timing right makes the difference between abundant blooms and bare branches. The key is knowing whether your plants flower on growth from this year or last year, and adjusting your pruning schedule accordingly.
Early Spring Pruning Versus Dormant Pruning
Early spring pruning happens when you see new leaf buds starting to swell at the base of your plants. This timing works well for perennials that die back completely in winter. You’ll cut away the old stems just as fresh growth emerges from the ground.
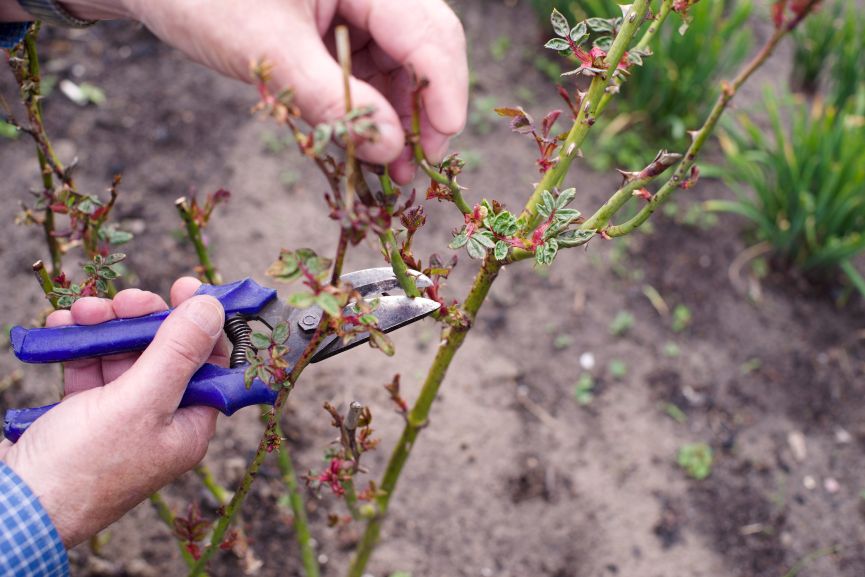
Dormant pruning takes place in late winter before any growth starts. This approach suits woody perennials and shrubs that keep their structure through cold months. You make cuts while the plant is still asleep, which puts less stress on it.
Understanding the cycles of each perennial helps you decide which method to use. Some plants need their stems left through winter for root protection. Others benefit from a clean slate before growth begins. Watch your plants closely in late winter to spot when buds begin swelling, which signals the shift from dormant to active growth.
- As temperatures rise, new shoots emerge from the plant’s overwintering roots or crown (the base of the plant).
- The plant directs massive amounts of energy into rapid foliage growth.
Summer (Blooming & Reproduction):
- The plant expends its resources on producing flowers.
- During this time, the flowers are pollinated and begin developing seeds.
Fall (Seed Spreading & Preparation):
- The plant disperses its seeds.
- As frost approaches, energy is redirected from above-ground growth down into the root system to build reserves for winter.
Winter (Dormancy):
- Above-ground growth halts.
- Herbaceous perennials have soft stems that die back to the ground, while woody perennials (like shrubs and trees) retain their structure.
- The roots remain alive underground, waiting for spring.
Identifying Bloom on Old Wood Versus New Wood
Plants that bloom on old wood form their flower buds on stems that grew last year. Spring-blooming shrubs like lilac and forsythia fall into this category. If you prune these in early spring, you’ll cut off the buds that would have bloomed.
New wood bloomers create flowers on stems that grow in the current season. These plants include most summer-flowering perennials and shrubs. You can prune them in early spring without losing blooms because they’ll form buds on fresh growth.
To tell the difference: Watch where buds form on your plants during the growing season. Old wood bloomers show fat flower buds on last year’s stems in late winter. New wood bloomers stay bare on old stems and push out flowers only on fresh green growth. Keep notes about when different plants bloom so you remember their patterns next year.
Prune After Bloom: Avoiding Missed Flowers
For spring-blooming perennials, wait until flowers fade before making cuts. This timing preserves the current year’s display while giving plants time to set buds for next season.
Right after blooming, the plant shifts energy into new growth. Pruning during this window shapes the plant and removes spent flowers without affecting next year’s buds. The new stems that grow after your cuts will harden off before winter and develop flower buds for the following spring.
One mistake at the wrong time may result in no blooms for that year, but your plant will recover. Most perennials tolerate pruning errors as long as you provide basic care. Mark your calendar when each plant finishes blooming so you remember the right window next season.
Essential Tools and Preparation for Pruning
Thank you for the Utah State University Extension for their Valuable Contribution
Having the right tools and keeping them in good condition makes pruning easier and protects your plants from damage. Clean, sharp equipment creates cuts that heal quickly and prevents disease spread between plants.
Choosing the Right Pruning Shears and Loppers
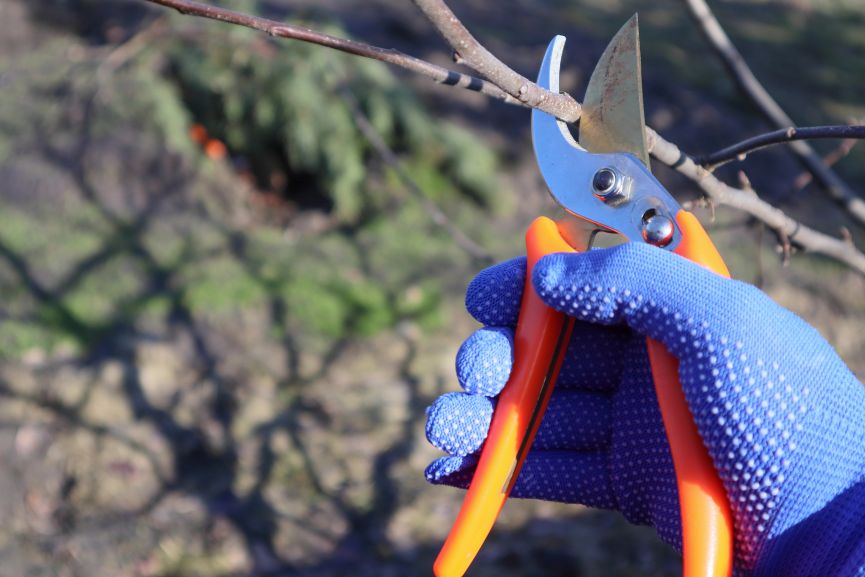
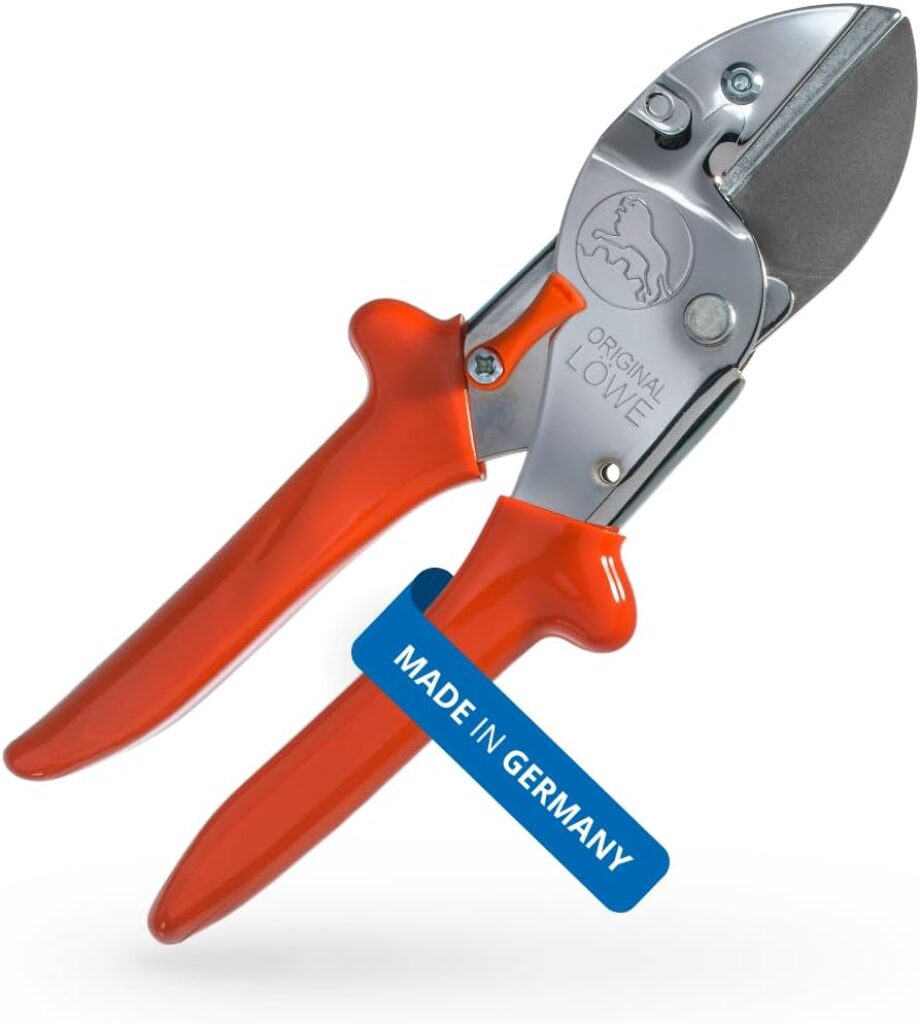
Pruning shears are your main tool for cutting stems up to about three-quarters of an inch thick. You’ll find two main types: bypass pruners and anvil pruners. Bypass pruners work like scissors with two curved blades that slide past each other. They make cleaner cuts and work best for living stems.
Anvil pruners have one sharp blade that closes onto a flat surface. These work well for dead wood but can crush living stems.
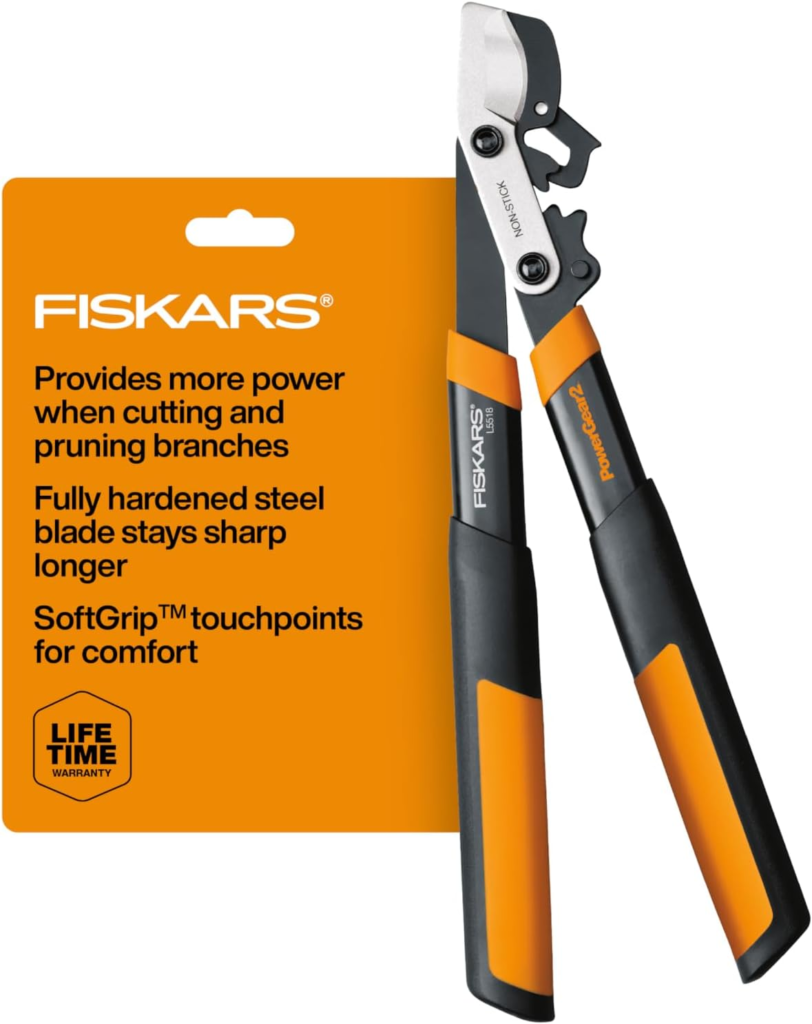
For thicker branches between one and two inches, you need loppers. These long-handled tools give you extra reach and cutting power. Look for loppers with handles between 18 and 24 inches long for spring perennials and small shrubs.
Choose tools that feel comfortable in your hand. The weight should feel balanced, and the handles should open and close smoothly without strain.
Sanitizing and Maintaining Sharp Shears
Keeping your shears clean and sharp prevents disease spread and makes better cuts. Dull blades crush stems instead of cutting cleanly, which slows healing and invites infection.
Sharpen your pruning shears before starting your spring work. Use a small file or sharpening stone at a 20-degree angle along the beveled edge. Test the sharpness by cutting a piece of paper.
Thanks you to the UCCE Master Gardeners of Sacramento County for this Valuable Video
Clean your tools with soap and water to remove dirt and plant sap. Remove any rust with steel wool or a wire brush before you begin pruning.
Sanitize between each plant using one of these methods:
- Isopropyl alcohol (70% or higher)
- Hydrogen peroxide solution
- Diluted bleach (1 part bleach to 9 parts water)
Wipe the blades with your chosen sanitizer and let them dry before moving to the next plant. This step is critical when removing diseased material.
Supporting Implements: Garden Forks and More
A garden fork helps you work around the base of perennials without damaging roots. Use it to gently loosen soil and remove debris that accumulated over winter. This makes it easier to see what needs cutting.
Keep a small bucket or tarp nearby to collect pruned material as you work. This keeps your garden tidy and makes cleanup faster.
Wear gloves to protect your hands from thorns, rough stems, and blisters during extended pruning sessions. Garden kneelers or foam pads make low work more comfortable.
A spray bottle filled with your sanitizing solution lets you quickly clean blades between plants. This is more efficient than dipping tools into a container repeatedly.
How to Prune Spring Perennials Step-by-Step
Thanks to the Wasco Nursery and Garden Center for this Great Contribution
Pruning perennials correctly requires clean tools, proper cutting angles, and knowing where to make each cut. The process starts with removing problem areas, then moves to shaping cuts that encourage healthy new growth.
Inspecting for Dead, Diseased, or Damaged Branches
Start your inspection at the base of each plant and work your way up. Look for stems that are brown, brittle, or show no signs of new growth. These dead stems pull energy away from healthy parts of the plant.
Diseased branches often show discoloration, spots, or unusual growths. You might see black spots, white powder, or areas that look rotted. Remove these immediately to stop diseases from spreading to healthy tissue.
Check for damaged stems that are broken, cracked, or bent. Winter weather and heavy snow often cause this type of damage. Even partially damaged stems struggle to grow properly and create entry points for disease.
Make notes about what you find on each plant. This helps you track problem areas year after year. Removing dead, diseased, or damaged wood can happen at any time during the season, not just spring.
Always sanitize your pruning shears between plants using rubbing alcohol or hydrogen peroxide. This prevents transferring diseases from one perennial to another.
Proper Cutting Techniques and Shapes
Cut stems at a 45-degree angle about ¼ inch above a healthy bud or node. This angled cut allows water to run off instead of pooling on the cut surface. Cuts made too close to buds can damage them, while cuts made too far away leave stubs that die back.
Use sharp, clean blades for every cut. Dull blades crush stems instead of cutting cleanly, which slows healing and invites infection. Your cuts should look smooth, not ragged or torn.
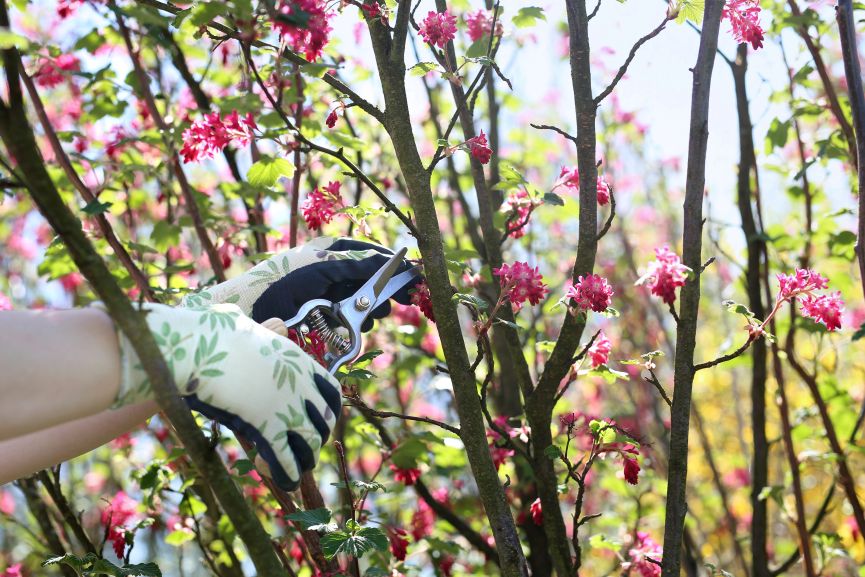
Position your cut to direct new growth outward from the center of the plant. This creates better air circulation and prevents branches from crossing. Look for buds that face away from the plant’s center and cut just above them.
For plants that bloom on new wood, you can cut back more aggressively. Plants that bloom on old wood need lighter pruning to preserve flower buds. Understanding whether plants bloom on new or old growth determines how much you should remove.
Remove no more than one-third of the plant’s total growth in a single session. Taking too much weakens the plant and reduces flowering.
Deadheading and Shaping for Better Growth
Deadheading means removing spent flowers before they form seeds. Cut or pinch off faded blooms right below the flower head, just above the next set of leaves. This redirects energy into upcoming blooms rather than seed production.
For perennials with long bloom times, deadhead throughout the season. You’ll see more flowers and extended flowering periods. Some plants like coneflowers and black-eyed Susans respond especially well to regular deadheading.
Shape your perennials by selectively removing stems that grow in awkward directions. Step back periodically to view the overall form. Remove stems that cross or rub against each other, as these create wounds.
Pinching works well for plants like chrysanthemums and asters. Remove the top ½ to 1 inch of stem tips in early spring. This creates bushier plants with more flower buds. Stop pinching about 6-8 weeks before you expect blooms.
Leave seedheads on plants if you want them to self-seed or provide food for birds. Not every perennial needs aggressive deadheading to perform well.
What to Prune and What to Leave Alone in Spring
Timing your spring pruning correctly means understanding which plants benefit from cutting back now and which ones need to wait. Some plants bloom on new growth and respond well to spring cuts, while others set buds on old wood and will lose their flowers if trimmed too early.
What to Cut Back in Spring
Spring is the right time to prune plants that bloom on new growth produced during the current season. These plants form flower buds on stems that grow after you make your cuts.
Summer-blooming shrubs like butterfly bush, crape myrtle, and rose of Sharon should be pruned in early to mid-spring. Cut these back before new growth starts to emerge. You’ll encourage stronger stems and more flowers by trimming them now.
Ornamental grasses need cutting back to about 4-6 inches from the ground before new shoots appear. Remove all the dead foliage from last year to make room for fresh growth.
Late-blooming perennials including sedum, asters, and Russian sage benefit from spring pruning. Cut back dead stems to the base where you see new growth emerging. Removing dead, diseased, or damaged areas should be your priority with these plants.
Roses (except once-blooming varieties) need pruning in spring after the last frost. Remove dead wood, crossing branches, and weak growth. Cut back to healthy wood with outward-facing buds.
Plants to Avoid Pruning Early
Early spring bloomers should be left alone until after they finish flowering. These plants set their flower buds on old wood from the previous growing season.
Wait to prune these plants until right after they bloom:
- Lilac
- Forsythia
- Azalea
- Rhododendron
- Flowering quince
- Weigela
Evergreens don’t need pruning in early spring. They’re best left to grow naturally during this time. Any shaping should wait until late spring or early summer after the first flush of growth hardens off. Enf of May or Early June is the perfect time.
Tender perennials that might have experienced winter damage need time to show signs of life. Wait until you see where new growth emerges before cutting. If you prune too early, you might remove stems that look dead but are actually alive.
Special Considerations for Spring-Blooming Shrubs
Winter-flowering shrubs like mahonia, witch hazel, and camellias need pruning right after their flowers fade. These plants develop next year’s flower buds on new growth that forms during spring and summer.
Cut back about one-third of the oldest stems on these shrubs to encourage fresh growth. Make your cuts just above an outward-facing bud or where a side branch meets the main stem. This allows the plant enough time to develop new wood that will carry next season’s blooms.
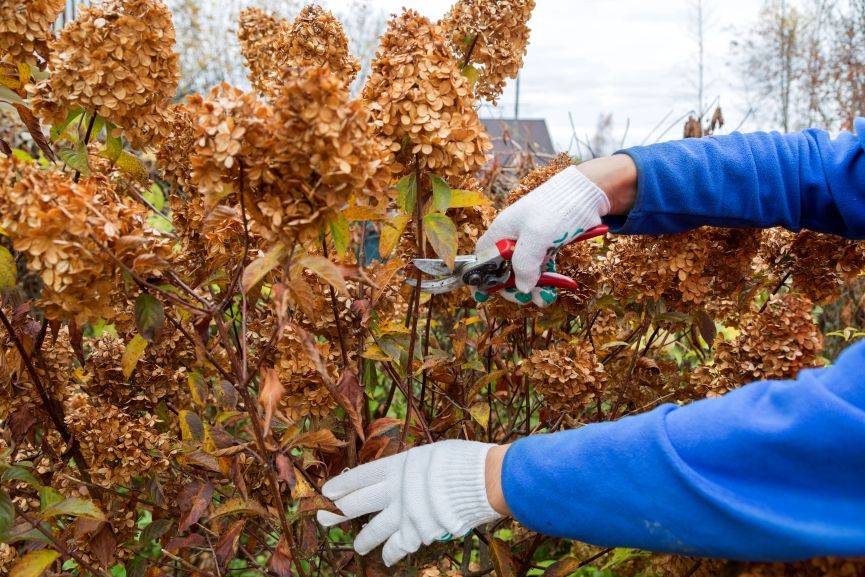
Hydrangeas require special attention based on their type. Bigleaf and oakleaf hydrangeas bloom on old wood and should only have dead wood removed in spring. Panicle and smooth hydrangeas bloom on new wood and can be cut back hard in early spring.
Check the variety before you make any cuts to avoid losing flowers.
Common Spring Pruning Mistakes to Avoid
Making errors during spring pruning can harm your perennials and reduce their flowering potential. Poor timing, aggressive cutting, and using the wrong tools are the most frequent problems that gardeners face when maintaining their spring perennials.
Recognizing and Preventing Over-Pruning
Over-pruning ranks among the most damaging errors you can make with spring perennials. When you remove more than one-third of a plant’s total growth in a single session, you stress the plant and limit its ability to photosynthesize.
Your perennials need their foliage to produce energy for root development and flowering. Cutting back too much forces the plant to redirect energy toward survival rather than blooms.
Watch for these signs of over-pruning:
- Sparse or delayed flowering
- Weak, leggy new growth
- Yellowing leaves on remaining stems
- Increased susceptibility to pests and diseases
Stop cutting once you’ve removed dead material and shaped the plant lightly. If you’re unsure whether to cut more, step back and leave the plant alone. You can always prune more later, but you cannot reattach removed stems.
Timing Errors and Their Impact
Pruning your perennials at the wrong time eliminates the season’s flowers before they even form. Spring-blooming perennials set their flower buds on old wood from the previous year, so cutting them back in early spring removes those buds.
Wait until after flowering finishes to prune spring bloomers like candytuft, creeping phlox, and basket-of-gold. These plants need their stems intact during their bloom period.
Summer-blooming perennials follow different rules. Prune these plants in early spring before new growth emerges. Coneflowers, black-eyed Susans, and bee balm benefit from spring pruning because they bloom on new wood.
Mark your calendar with specific pruning dates for each perennial type in your garden. This prevents you from accidentally cutting at the wrong time.
Tool-Related Pruning Mistakes
Dull or dirty pruning tools create ragged cuts that invite disease into your perennials. Clean cuts heal quickly, while torn tissue struggles to seal properly and becomes an entry point for pathogens.
Sharpen your pruning shears before each spring season. Use sharp pruners or loppers to avoid making ragged cuts that damage plant tissue.
Clean your tools with rubbing alcohol or a 10% bleach solution between plants. This simple step prevents spreading fungal diseases and bacterial infections throughout your garden.
Using the wrong tool for the job also causes problems. Hand pruners work for stems up to 1/2 inch thick, while loppers handle stems up to 1.5 inches. Forcing a small tool to cut thick stems crushes the tissue instead of making a clean cut.
Pro Tips for Healthy Perennials and Abundant Blooms
Success with spring perennials goes beyond basic cuts. Smart techniques for promoting growth, preventing disease spread, and following a consistent schedule will transform your garden into a thriving showcase.
Encouraging Vigorous Growth and Blooming
Deadheading spent flowers redirects plant energy toward producing more blooms rather than seed production. This simple technique extends flowering periods by several weeks for many perennials.
Cut back leggy growth by one-third to encourage bushier, more compact plants. Make your cuts just above a leaf node or bud to promote new branching at that point.
Timing matters for bloom production. Plants that flower on new wood should be pruned in early spring before growth starts. Those that bloom on old wood need pruning immediately after flowering ends.
Feed your perennials after major pruning sessions to support new growth. A balanced fertilizer or compost application gives plants the nutrients they need to recover quickly and produce strong stems.
Remove no more than one-third of the plant’s total growth in a single session. Taking too much at once stresses the plant and reduces its ability to photosynthesize and grow vigorously.
Using Hygiene Practices to Avoid Spreading Disease
Clean and sanitize your pruning tools between each plant to prevent disease transmission. Wipe blades with isopropyl alcohol or hydrogen peroxide and let them dry before moving to the next plant.
Sharp blades create clean cuts that heal faster. Dull or rusty tools crush plant tissue, leaving ragged wounds that invite infection and take longer to seal over.
Dispose of diseased plant material in the trash rather than your compost pile. Composting infected stems and leaves can spread pathogens throughout your garden when you use the finished compost.
Prune during dry weather when possible. Wet conditions promote fungal growth and disease spread through open cuts. Wait for morning dew to evaporate before starting your pruning work.
Yearly Checklists for Successful Spring Pruning
Create a calendar noting when each perennial in your garden blooms and its preferred pruning time. This spring pruning guide approach prevents accidentally removing flower buds.
Early spring tasks include removing winter damage, cutting back ornamental grasses to 3-4 inches, and trimming back dead stems on herbaceous perennials once new growth appears at the base.
Mid-spring focus shifts to shaping plants and removing the three D’s: dead, diseased, and damaged growth. These cuts improve plant health and appearance at any point in the growing season.
Track which plants need division every few years. Overcrowded perennials produce fewer blooms and benefit from being split and replanted with proper spacing.
Document your pruning mistakes and successes each year. Even incorrect timing usually just means missing one season of blooms, giving you another chance to get it right next year.
Frequently Asked Questions
The right timing and techniques matter when you prune perennials in spring. Clean tools and knowing your plant’s bloom schedule help you avoid mistakes that reduce flowers or damage new growth.
I hope you enjoyed this post and as usual if you have any comments or feedbacks please share with us and the rest of the community. We certainly want to hear from you. If you have questions or you are not certain on what to prune with your perennials and when leave us a word.
I do receive a commission at no cost to you from sales referred by our links. The commission received helps me and my team enhance our reviews and buying guides by acquiring some of the products to better serve you. Rest assured, we have carefully selected these products for their usefulness and quality.